The authors offer the reader more than one way to learn each braid:
The following video illustrates many of the techniques taught on this page:
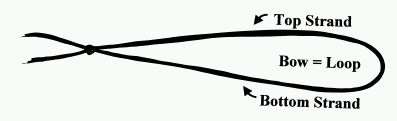
| Strand: One half of a bowe (or one side). Each bowe has 2 sides: a top strand and a bottom strand. |
|
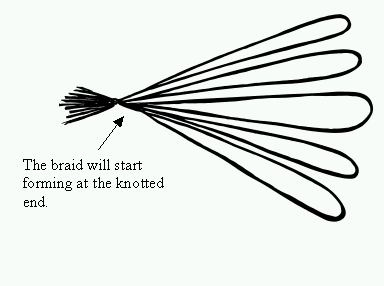
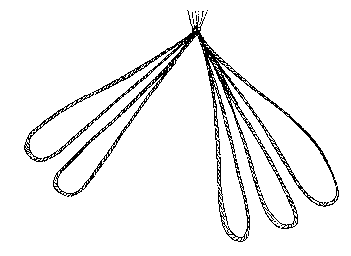
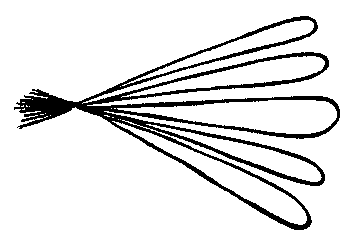
| A set of five bowes ready to be braided: |
|
|
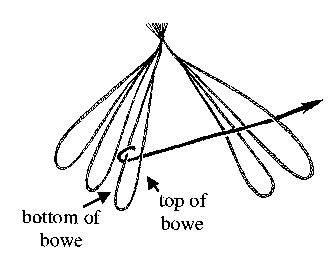
Before you begin to make a braid, let's look at how the bowes will
move to make the loops interlace.
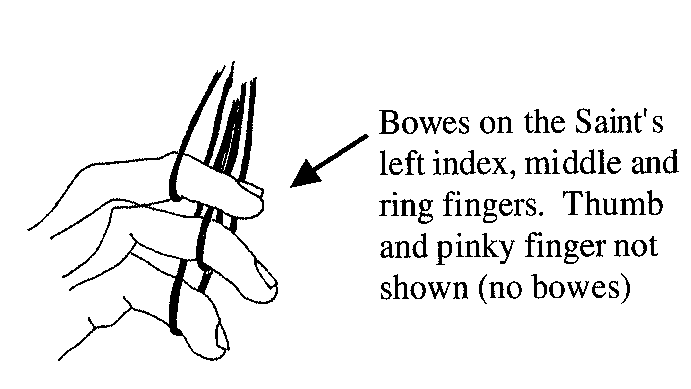
Imagine that you have put 3 bowes on the left hand fingers and 2 bowes on the right hand fingers. This diagram doesn't show your fingers, just the bowes: |
|
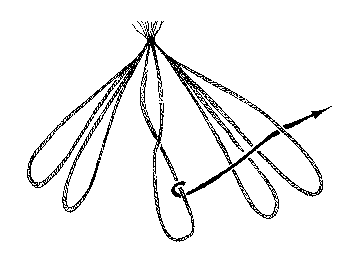
| The lowest bowe on the left was taken reversed through the middle of the top bowe on the right. |
|
| It then became the top bowe on the right. |
|
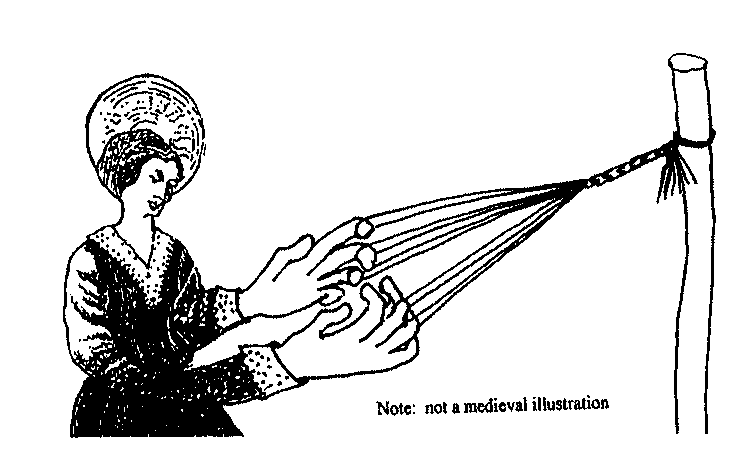
| The bowes are tied to a sturdy object and your fingers are slipped through them, usually one bowe to one finger. Some fingers are empty of bowes. Your fingers hook slightly to keep the bowes in place. You control the bowes by tensioning them (gently!) with your fingers pulling on them. The Braiding Saint is ready to move the bowes as we show on the left. |
|
|
She holds the bowes in her top finger crease with her fingers crooked
towards her palm to keep the bowes from falling off her fingers.
We are not showing the right hand, which would have bowes on the right middle and ring fingers, with no bowes on the pinky finger or the thumb. |
|
|
|
|
|
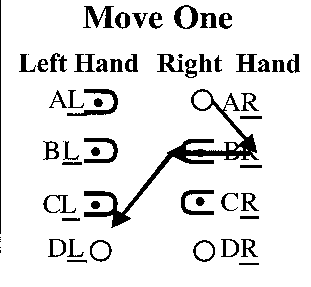
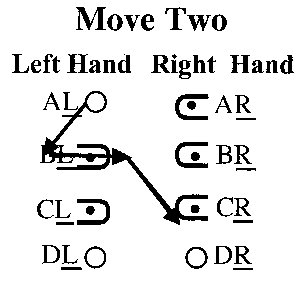
Labelling Abbreviations:
| FINGERS | HANDS | PEOPLE |
| A = index finger | R = right hand | R' = right worker |
| B = middle finger | L = left hand | L' = left worker |
| C = ring finger | M' = middle worker | |
| D = pinky finger |
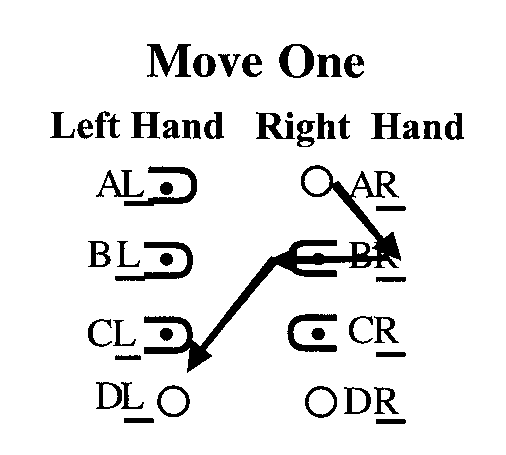
Let's label the bowes for the first pattern as you put them on your fingers:
According to our new labelling rules you will have a bowe on AL, BL, and CL. You will also have a bowe on BR and CR.
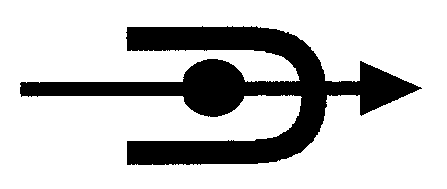
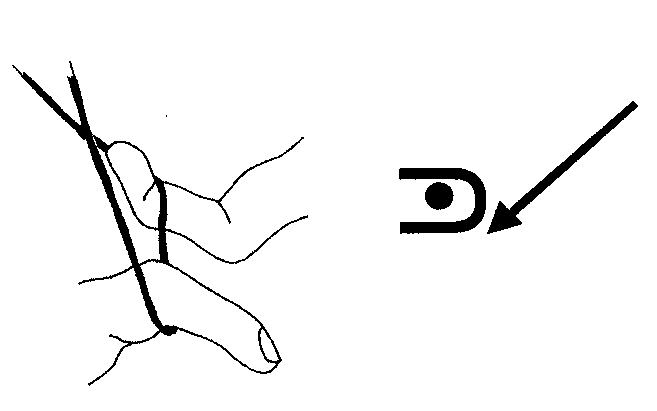
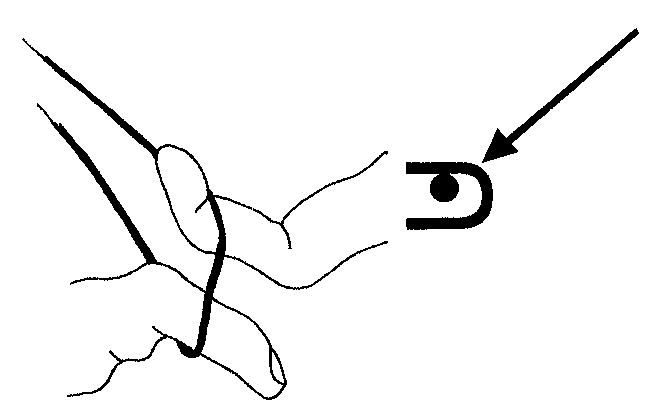
The schematics show the bowes on your fingers as if you were looking down at your own hands as they hold the loops. The arrows point to the path your "picking" finger will follow to transport a bowe to its next position. The arrow indicates how to pick up the bowe, reversed or unreversed, depending on where it is positioned. (See reversed and unreversed, next section). NOTE: the thumbs are not shown.

|
Bowe on right finger |

|
Bowe on left finger |
|
No bowe on finger |
|
Arrow showing path of picking finger through the middle of bowe on finger |
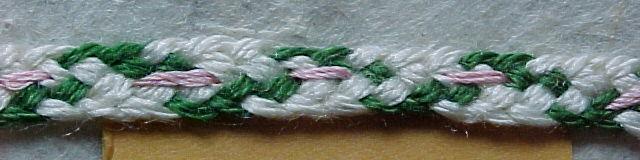
Note: the lavander thread is the thread used to sew the braid into Zoe's book.
The transcription is taken from the original manuscript - which, in this case, dates from around the year 1475. Since it was in Middle English, we have translated it into modern English.
NOTE: The transcriptions and translations are found in the Appendix for each braid pattern. The Appendix also includes information on which pattern came from which manuscript.
This translation was used to create the modern instructions, which follow. The braiding moves are detailed step-by-step in words. Some steps, such as the walking down of the bowes to position them for the next transfer of bowes is included here but not in the visual schematics shown below.
|  |
|
|
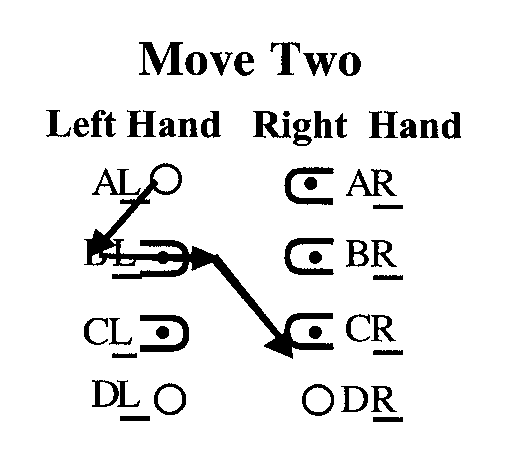
Basically, by clever dexterity on your part, in Move One you will use finger AR (right index finger) to pick up bowe CL from your left hand, by going through the middle of the BR loop and finding CL a new home on your formerly loop-free AR finger. Keep all the bowe holding fingers hooked as you pull CL through the middle of BR and straighten out your AR index finger. CL is the only bowe that should change positions. You're going to re-arrange the loops on your left hand (See Walking the Bowes, next section.) to free your left hand index finger and then make the same move (mirror image) with the other hand. Repeating these two actions will result in "a brode lace of v bowes-c. 1475".
NOTE: You thumb will always "come along for the ride" with your picking finger to help hold the bowe being moved.
Unless otherwise indicated, instructions telling you to go through a bowe, such as BR above, always mean through the middle of the bowe. When going through several bowes, you will go through the middle of each of them in the order mentioned.
|
To reverse (REV) your bowe is to flip it upside down so the top strand is now the bottom strand. |
|
Taking bowes Unreversed - (UNREV)
To take a bowe unreversed (UNREV), keep the top strand on top of the finger taking it. |
Tension the braid as you work!
Each time you pull one bowe through another bowe, you must tension the braid by stretching out your arms, rather like a butterfly pumping its wings. You will have to practice to get an even tension. At the beginning, the tension is far looser than at the end, when the braiding loops are much shorter and you have greater leverage. Old braids are analyzed in part by the varying tension that is typical of fingerloop braiding. You can lessen the difference by pulling tightly at the beginning and pulling gently at the end when the loops are getting a lot shorter.
Note: Most braids require one bowe on each finger. Later in this in this booklet you will learn patterns for some that call for two bowes on a finger. You will often have fingers with no bowe at all on them. In fact, in these instructions, your thumb is only a helper, not one of the finger "players" we will be keeping track of.
There are some things that could go wrong:
Be sure you pick up the new bowe in the right orientation. Remember that Reversed and Unreversed positions can radically change the type of braid you are making. If you pick up a bowe in a different way than we suggest, you may get a different braid, since you are changing the structure.
As you pull bowes through other bowes, keep your pulling hand palm slightly slanted up and your fingers crooked. This speeds the process and keeps the bowe from falling loose, thus messing up your pattern. Sometimes a bowe drops off a finger. Pick it up and put it on the finger it fell from. It may result in a braiding flaw, but little can be done. Old braids exhibit these types of dropped loop errors.
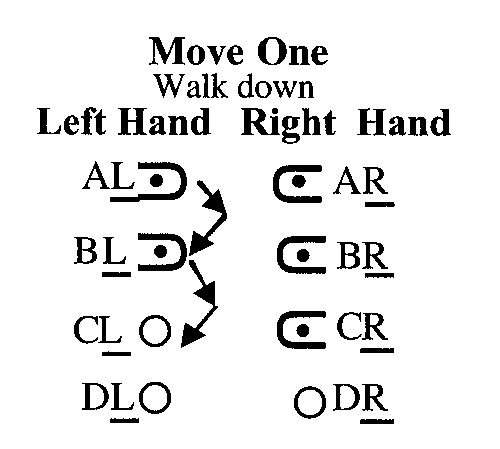
Low the Bowes:
A walk down from Move One: to free the left index finger for the "mirror move", you walk down BL to CL and AL to BL. Then proceed to Move Two.
High the Bowes:
Example:
If you have bowes on BCL and you are to 'high' the bowes, walk up BL to AL, CL to BL.

Return to the index.
Webbed by Greg Lindahl